This post will show you how to create a custom index template for Elasticsearch.
Why would you need to create a custom template Lets say you are storing ASN data in your Elasticsearch index.
For example…
- Google Inc. – 15 messages
- Facebook Inc. – 25 messages
- Linkedin Inc. – 33 messages
When you query the index for ASN fields, you are going to get 15 hits for Google, 25 hits for Facebook, 33 hits for Linkedin and 73 hits for Inc. This is because, by default, ElasticSearch does automatic index creation which analyzes each field and splits strings at spaces when indexing. So what if you want to just have the whole field item return as a result so that something like “Google Inc” will show up as 15 hits? Well, you have to create an ElasticSearch index template. Note: creating a template will not magically modify old indexes, that data has already been indexed. The template will only work for newly created indices in ElasticSearch after you add the template.
First thing you need to do is figure out the naming scheme for your indices. Knowing the name pattern for new indices will make it so that the template you are about to create only applies to that index and not other indices in ElasticSearch. I use logstash to ship everything to ElasticSearch and the default index naming pattern is logstash-YYYY-MM-DD so, iny my template, I will have logstash* with the asterisk acting as a wildcard. If you’re not using logstash and are unsure of the naming, go to /var/lib/elasticsearch and look in the indices folder to see the names of your current indices. Remember this for when we create the template.
Next you want to find the name inside of a current index so the template will only match the types you want it to match. Open your browser and type http://localhost:9200/_all/_mapping?pretty=1 in the URL bar and hit enter.
For example: I see
"logstash-2014.09.30": {
        "cisco-fw": {
            "properties": {
Because I have my logstash config file set to specify anything coming in on a certain port as type cisco-fw and because of that, the type in ElasticSearch is cisco-fw but yours might be default or something else. Remember this for when we create the template
Next thing is open up a notepad so we can start creating the template.
Here is the template for your template

curl -XPUT http://localhost:9200/_template/logstash_per_index -d '
{
    "template" : "logstash*",
    "mappings" : {
      "cisco-fw" : {
      }
    }
}'
Where logstash_per_index is the name you want to give the template, logstash* is the index naming scheme and cisco-fw is the type.
Now, under properties, you are going to set the field type and options based on field name. For my example, I am doing ASN values, so, under properties, I would write
"asn":{"type":"string", "index":"not_analyzed"}
The ASN type is a string (obviously) and index is set to not_analyzed. Not_analyzed means that it is still searchable with a query, but it does not go through any analysis process and is not broken down into tokens. This will allow us to see Google Inc as one result when querying ElasticSearch. Do this for all the fields in your index. For example, here is my completed template…
#!/bin/sh
curl -XPUT http://localhost:9200/_template/logstash_per_index -d '
{
    "template" : "logstash*",
    "mappings" : {
      "cisco-fw" : {
         "properties": {
            "@timestamp":{"type":"date","format":"dateOptionalTime"},
            "@version":{"type":"string", "index" : "not_analyzed"},
            "action":{"type":"string"},
            "bytes":{"type":"long"},
            "cisco_message":{"type":"string"},
            "ciscotag":{"type":"string", "index" : "not_analyzed"},
            "connection_count":{"type":"long"},
            "connection_count_max":{"type":"long"},
            "connection_id":{"type":"string"},
            "direction":{"type":"string"},
            "dst_interface":{"type":"string"},
            "dst_ip":{"type":"string"},
            "dst_mapped_ip":{"type":"ip"},
            "dst_mapped_port":{"type":"long"},
            "dst_port":{"type":"long"},
            "duration":{"type":"string"},
            "err_dst_interface":{"type":"string"},
            "err_dst_ip":{"type":"ip"},
            "err_icmp_code":{"type":"string"},
            "err_icmp_type":{"type":"string"},
            "err_protocol":{"type":"string"},
            "err_src_interface":{"type":"string"},
            "err_src_ip":{"type":"ip"},
            "geoip":{
               "properties":{
                  "area_code":{"type":"long"},
                  "asn":{"type":"string", "index":"not_analyzed"},
                  "city_name":{"type":"string", "index":"not_analyzed"},
                  "continent_code":{"type":"string"},
                  "country_code2":{"type":"string"},
                  "country_code3":{"type":"string"},
                  "country_name":{"type":"string", "index":"not_analyzed"},
                  "dma_code":{"type":"long"},
                  "ip":{"type":"ip"},
                  "latitude":{"type":"double"},
                  "location":{"type":"geo_point"},
                  "longitude":{"type":"double"},
                  "number":{"type":"string"},
                  "postal_code":{"type":"string"},
                  "real_region_name":{"type":"string", "index":"not_analyzed"},
                  "region_name":{"type":"string", "index":"not_analyzed"},
                  "timezone":{"type":"string"}
               }
            },
            "group":{"type":"string"},
            "hashcode1": {"type": "string"},
            "hashcode2": {"type": "string"},
            "host":{"type":"string"},
            "icmp_code":{"type":"string"},
            "icmp_code_xlated":{"type":"string"},
            "icmp_seq_num":{"type":"string"},
            "icmp_type":{"type":"string"},
            "interface":{"type":"string"},
            "is_local_natted":{"type":"string"},
            "is_remote_natted":{"type":"string"},
            "message":{"type":"string"},
            "orig_dst_ip":{"type":"ip"},
            "orig_dst_port":{"type":"long"},
            "orig_protocol":{"type":"string"},
            "orig_src_ip":{"type":"ip"},
            "orig_src_port":{"type":"long"},
            "policy_id":{"type":"string"},
            "protocol":{"type":"string"},
            "reason":{"type":"string"},
            "seq_num":{"type":"long"},
            "spi":{"type":"string"},
            "src_interface":{"type":"string"},
            "src_ip":{"type":"string"},
            "src_mapped_ip":{"type":"ip"},
            "src_mapped_port":{"type":"long"},
            "src_port":{"type":"long"},
            "src_xlated_interface":{"type":"string"},
            "src_xlated_ip":{"type":"ip"},
            "syslog_facility":{"type":"string"},
            "syslog_facility_code":{"type":"long"},
            "syslog_pri":{"type":"string"},
            "syslog_severity":{"type":"string"},
            "syslog_severity_code":{"type":"long"},
            "tags":{"type":"string"},
            "tcp_flags":{"type":"string"},
            "timestamp":{"type":"string"},
            "tunnel_type":{"type":"string"},
            "type":{"type":"string"},
            "user":{"type":"string"},
            "xlate_type":{"type":"string"}
      }
    }
  }
}'
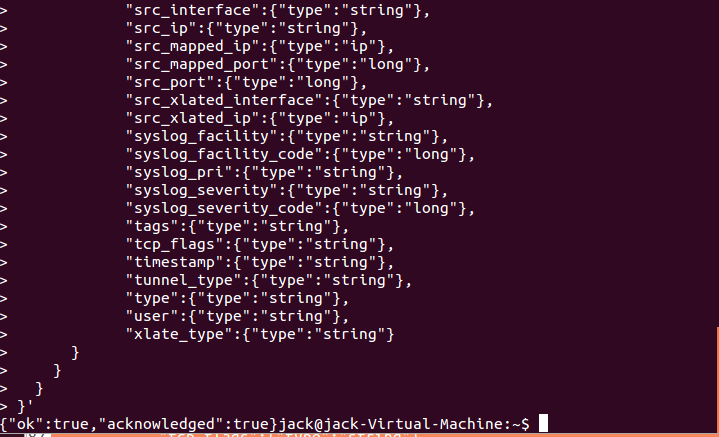
Once you change all the types you need, it is now time to add the template to ElasticSearch. You can either save you file in notepad, make it a script and run that through a terminal window or you can copy the text from notepad and enter into a terminal window. You should see a {“ok”:true,”acknowledged”:true} response if everything was formatted properly.
And that is it. You will only see the fruits of your labor when a new index is created and matches the parameters set in your template file (i.e logstash*). Because of my naming scheme with Logstash, new indices are only created at the start of the day (logstash-YYYY-MM-DD) so I had to wait until the next day to see if my template was working properly. If you are impatient, cannot wait to see if it worked or not and don’t care about losing data in your current index then you can delete it from ElasticSearch by issuing the following CURL command in a terminal window
curl -XDELETE localhost:9200/index_name
where index_name is the name of your index (ex. logstash-2014-12-11)
Helpful tip: if you start seeing data not show up in the index, it is very possible that you may have messed up one of the field types in you template file. I am writing this because I ran into this issue and could not figure out why there was no data in my index. To solve this, go to /var/log/elasticsearch and see the log file for the date where data was not properly going into the ElasticSearch index (it should be a lot bigger in file size compared to the other log files). In the log file, I was seeing this error multiple times
org.elasticsearch.index.mapper.MapperParsingException: failed to parse [protocol]
What happened was that, thinking protocol meant port number protocol (ex. 25, 80, 443 etc), I set the protocol field as type LONG. To my surprise, protocol was either TCP or UDP so it should have been set as type string. ElasticSearch was expecting a long to index based off my template but instead was getting strings so the application freaked out. Instead of modifying the template file on the server, I decided to delete it from ElasticSearch, make my changes to the protocol field and then re-upload the template back to ElasticSearch. To do that, I opened a terminal and typed
curl -XDELETE http://localhost:9200/_template/logstash_per_index
where logstash_per_index is the name of the template. That command will delete the template off of your server. Make your changes to your template in notepad and then add the template back to ElasticSearch.
Since the template only applies to newly created indices and your index did not have any data inside of it because of the incorrect template, you can go ahead and just delete that index and create a new one that will work with the newly modified template.
curl -XDELETE localhost:9200/index_name
where index_name is the name of your index (ex. logstash-2014-12-11).
And that is it. Leave a comment down below if you found this information helpful or if you have any questions for me. Good luck!